|
|
|
 |
|
|
| |

 |
|
| |
|
|
| |
 
- Windows
95/98/2000/ME/NT/XP
- TCP/IP
networking

We recommend that you remove
TridiaVNC from your system before installing a new
release. 
- Download the TridiaVNC
distribution for Win95/98/2000/ME/NT/XP to the temporary directory of your
choice.
If you are installing TridiaVNC for Windows NT, you will need to
have administrator privileges on the local machine. If your current account
does not have these, log out and log back in as the
administrator.
- After downloading,
double-click on the saved tvncinst.exe file.
- This will launch
InstallAnywhere and start the installation.
TridiaVNC incorporates
InstallAnywhere into its installation process. This provides our users with a
convenient cross-platform installation for all certified platforms. The
InstallAnywhere install program will start and take you step-by-step through
the installation process.
- InstallAnywhere's
instructions are available in a variety of languages.

Select the installation language you prefer and click
OK.
- The installation screen is
displayed providing navigational instructions. (For these examples, English was
chosen as the preferred language.)

Click
Next.
- The GNU General Public
License is displayed. Please read this license carefully.

If you agree to the terms of the license, click
Next.
- You are asked to select the
folder where you would like TridiaVNC installed.

Once you have chosen the file path, click
Next.
- You are then asked to
specify your shortcut preferences.

Make your selections, and click
Install.
- After installation, a
confirmation notice is displayed.

Click
Done to close the installer.
There is no need to restart your
machine.

When you wish to install a
new version of TridiaVNC, or simply wish to remove TridiaVNC from your machine
follow these steps.
- You will need to close your
TridiaVNC server and any running viewer sessions. (Look for the TridiaVNC icon
in your application tray.)
- Remove the service from the
system by selecting Start --> Programs --> TridiaVNC -->
Administrative Tools --> Remove TridiaVNC Service, or use the
-remove command-line option.
- Next, to remove the
remainder of TridiaVNC, select Start --> Setting --> Control Panel
--> Add/Remove Programs.
- Highlight TridiaVNC and
select Add/Remove. This opens the InstallAnywhere uninstall
program.

- Click
Uninstall.

TridiaVNC is removed from your
system. Any files not removed are noted.
- Click Exit to close
the window.


- X11 window system must be
present on target machine
- TCP/IP
networking
We recommend that you remove
TridiaVNC from your system before installing a new release.
- Download the TridiaVNC
distribution for Linux, Solaris SPARC, AIX, or HP-UX to the temporary directory
of your choice.
You will need to have a Java virtual machine (Java 1.1.4
or later) installed for AIX. This may be obtained from IBM's
site.
- After downloading, open a
shell and change to the directory where you downloaded TridiaVNC by typing
cd <download directory>.
- At the prompt, type tar
xvf filename.tar to exact the contents of the archive then sh ./tvncinst.bin to launch InstallAnywhere and start
the installation.
TridiaVNC incorporates InstallAnywhere into its
installation process. This provides our users with a convenient cross-platform
installation for all certified platforms. The InstallAnywhere install program
will start and take you step-by-step through the installation process.
-
| NOTE: |
If InstallAnywhere
does not appear to install TridiaVNC, during Step 3, type
sh ./tvncinst.bin -c in lieu of sh ./tvncinst.bin to launch
InstallAnywhere and start the installation. |
- InstallAnywhere's
instructions are available in a variety of languages.

Select the installation language you prefer and click
OK.
- The installation screen is
displayed providing navigational instructions. (For these examples, English was
chosen as the preferred language.)

Click
Next.
- The GNU General Public
License is displayed. Please read this license carefully.

If you agree to the terms of the license, click
Next.
- You are asked to select the
folder where you would like TridiaVNC installed.

Once
you have chosen the file path, click Next.
- You are asked where you
would like the link created. We recommend /usr/bin so that all users can
have access to TridiaVNC.

Once you have chosen the link path,
click Install. This will start the installation.
- After installation, a
confirmation notice is displayed.

Click
Done to close the installer.
There is no need to restart your
machine.
-
| NOTE: |
If InstallAnywhere
does not appear to install TridiaVNC, during Step 3, type
sh ./tvncinst.bin -c in lieu of sh ./tvncinst.bin to launch
InstallAnywhere and start the installation. |
When you wish to install a
new version of TridiaVNC, or simply wish to remove TridiaVNC from your machine,
follow these steps.
- As the root user, open an X
Windows session or login shell.
- To run the installer, type:
sh /usr/lib/TridiaVNC/UninstallerData /Uninstall_TridiaVNC
This starts the InstallAnywhere uninstaller program.

- Click
Uninstall.
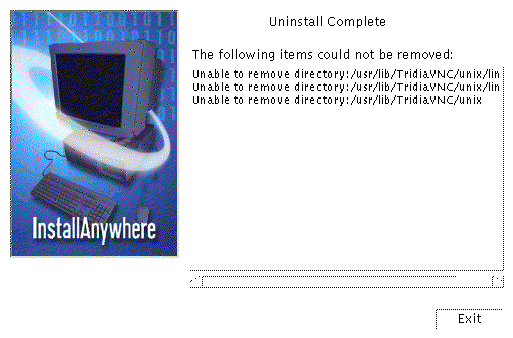
You are notified of removal
results.
- Click Exit to close
the window.
|
|
| |
|
|
| |
|
|
| |
|
|
| |
Copyright ©2024 Tridia Corporation,, all rights
reserved.
Send website comments to:
. |
|
|